Welcome to the Honeywell Air Purifier Manual, your guide to understanding and optimizing your unit. This manual covers installation, safety, and maintenance tips for peak performance and longevity.
1.1 Overview of Honeywell Air Purifiers
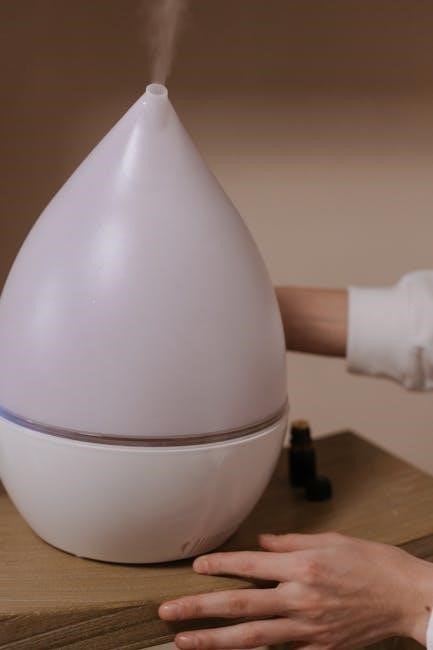
Honeywell air purifiers are designed to improve indoor air quality by capturing allergens, dust, and pollutants. They feature advanced filtration systems, including HEPA technology, which removes 99.97% of particles as small as 0.3 microns. Models like the HPA100, HPA300, and HPA200 offer multiple fan speeds, timers, and optional Wi-Fi connectivity for smart control. These units are energy-efficient and ideal for reducing allergens, making them suitable for homes, offices, and people with asthma or allergies.
1.2 Importance of Reading the Manual
Reading the Honeywell air purifier manual is essential for safe and effective operation. It provides crucial safety precautions, installation guidelines, and maintenance tips to ensure optimal performance. The manual also explains how to troubleshoot common issues and replace filters properly. By following the instructions, you can maximize energy efficiency, extend the unit’s lifespan, and maintain warranty coverage. Take the time to review the manual thoroughly before using your air purifier.
1.3 Safety Precautions
Ensure safe operation by following these guidelines. Always place the air purifier on a stable, level surface to prevent tipping. Keep it out of reach of children and pets. Avoid using the unit near water or in humid environments. Never operate the purifier with damaged cords or plugs. Turn it off and unplug when not in use or during cleaning. Do not cover the power cord with rugs or carpets, as this can cause overheating. Follow all instructions carefully to maintain safety and efficiency.

Understanding Your Honeywell Air Purifier Model
Honeywell offers a range of air purifier models, each designed with unique features. Understanding your specific model ensures proper maintenance and optimal performance for cleaner air.
2.1 Popular Honeywell Air Purifier Models
Honeywell offers various models, including the HPA100, HPA300, and HPA200 series. These models are known for their True HEPA filters, which capture 99.97% of allergens and pollutants. The HPA300 is particularly popular for its high coverage area and allergen reduction capabilities. These models are designed to provide efficient air cleaning, making them ideal for homes, offices, and spaces with specific air quality needs.
2.2 Key Features of Each Model
Honeywell air purifiers are equipped with advanced features such as True HEPA filters, which capture 99.97% of airborne particles. Many models include pre-filters for odor reduction and allergen detection. The HPA300 series offers a turbo mode for faster cleaning, while the HPA200 includes smart sensors for automatic adjustments. Higher-end models feature Wi-Fi connectivity, enabling remote control via smartphone apps for enhanced convenience and customized air quality management.
2.3 How to Identify Your Model Number
To identify your Honeywell air purifier model number, check the rear or bottom of the unit for a label containing the model information. It typically starts with “HPA” or “HFD.” You can also refer to the product packaging or the user manual provided with your purchase. Additionally, visit Honeywell’s official website, where you can search for your model number using the product page or filter replacement guides for accurate identification.
Installation and Setup Guide
Unpack your Honeywell air purifier, place it on a flat surface, and position it at least 3 feet away from walls. Plug it into a grounded outlet and refer to the manual for specific setup instructions.
3.1 Unpacking and Placement Guidelines
Start by carefully unpacking your Honeywell air purifier and inspecting for any damage. Place the unit on a flat, stable surface, ensuring it is at least 3 feet away from walls for optimal airflow. Avoid positioning it near curtains or furniture that could obstruct air circulation. Ensure the air purifier is not placed on carpets or rugs, as this may reduce efficiency. Always follow the manufacturer’s guidelines for proper placement to ensure maximum performance and safety.
3;2 Step-by-Step Installation Instructions
First, plug the Honeywell air purifier into a nearby electrical outlet, ensuring it is the correct voltage. Turn the unit on and set the fan speed to your desired level. Check for any air leaks around the filters and ensure they are securely installed. Place the purifier on a firm, flat surface and avoid covering it with curtains or rugs. Follow the manual’s instructions for Wi-Fi connectivity if applicable. Ensure all parts are properly assembled before operation.
3.3 Initial Setup and Testing
After installation, turn on the air purifier and ensure all lights and sounds indicate proper operation. Check for any unusual noises or vibrations. Test the fan speed settings to confirm functionality. Verify that all filters are securely installed and properly seated. Ensure the unit is placed on a stable surface to avoid tipping. Allow the purifier to run for a few minutes to circulate and clean the air effectively. Monitor performance during this initial phase.

Operating Your Honeywell Air Purifier
Turn on the air purifier, adjust fan speed, and use the timer or remote for convenience. Ensure proper operation by following guidelines for optimal performance.
4.1 Turning On the Air Purifier
To turn on your Honeywell air purifier, plug it into a nearby outlet and ensure it is placed on a stable, flat surface away from walls. Press the power button to activate the unit. Choose your desired fan speed using the control panel or remote. Always refer to the manual for specific instructions tailored to your model. Ensure the unit is unplugged when not in use for safety.
4.2 Adjusting Fan Speed and Settings
Honeywell air purifiers allow easy fan speed adjustment via the control panel or remote. Press the speed button to cycle through low, medium, or high settings. Some models feature an auto mode that adjusts fan speed based on air quality sensors. Use the remote for convenient control. Adjust settings to optimize noise levels and cleaning efficiency. Refer to your manual for model-specific instructions to customize your air purification experience effectively.
4.3 Using the Timer and Remote Control
Most Honeywell air purifiers come with a timer and remote control for added convenience. To set the timer, press the timer button and use the up/down arrows to select the desired duration (1-8 hours). The remote allows you to adjust fan speed, turn the unit on/off, and set the timer without leaving your seat. This feature is especially useful for maintaining clean air while saving energy. Refer to your manual for specific remote functions and timer settings.
Maintenance and Filter Replacement
Regularly check and replace filters to ensure optimal performance. Replace HEPA filters every 12 months and pre-filters every 3 months. Refer to the manual for specific guidelines.
5.1 Understanding Filter Types and Lifespan
Honeywell air purifiers use HEPA filters to capture 99.97% of particles as small as 0.3 microns, while pre-filters trap larger particles and odors. HEPA filters typically last 12 months, while pre-filters may need replacement every 3 months. Activated carbon filters, if included, reduce gases and odors and usually last 6 months. Always check your manual for specific guidelines, as lifespan varies based on usage and air quality conditions.
5.2 How to Replace HEPA and Pre-Filters
To replace HEPA and pre-filters, turn off and unplug the air purifier. Remove the grille or filter cover, then pull out the old filters. Discard them properly. Insert the new HEPA filter, ensuring it clicks into place, and replace the pre-filter. Reattach the cover and plug in the unit. Always refer to your model’s manual for specific instructions, as procedures may vary slightly between models for optimal performance and maintenance.
5.3 Cleaning and Maintaining the Unit
Regularly clean the air purifier to ensure optimal performance. Turn off and unplug the unit before cleaning. Use a soft, dry cloth to wipe the exterior and grilles. Avoid using harsh chemicals or moisture, as they may damage the electronics. For internal components, gently vacuum dust or debris. Never insert objects into vents or openings. Cleaning ensures efficient airflow and maintains the unit’s effectiveness in improving air quality and filter longevity.

Troubleshooting Common Issues
Address common issues like the unit not turning on or unusual noise. Check power connections and ensure filters are clean. Refer to the manual for detailed solutions.
6.1 Common Errors and Solutions
Common issues include the air purifier not turning on or displaying error lights. Check power connections and ensure the unit is properly plugged in. If the red error light appears, replace the filters. For unusual noise, ensure all parts are secure. Reset the unit by turning it off and unplugging it for 30 seconds. Refer to the manual for specific solutions or contact Honeywell support for assistance.
6.2 Resetting the Air Purifier
To reset your Honeywell air purifier, turn it off and unplug it from the power source. Wait for 30 seconds to allow any residual power to discharge. Plug it back in and turn it on. This process often resolves issues like error lights or unusual noise. If problems persist, check for blockages or dirty filters and ensure proper installation. Resetting can help restore default settings for optimal performance.
6.3 Diagnosing Filter Replacement Needs
Regularly check the filter indicator light on your Honeywell air purifier, which illuminates when replacement is needed. Refer to your manual for the expected lifespan of your specific filters. Inspect the HEPA and pre-filters for visible dirt or reduced airflow. If the air purifier’s performance decreases or unusual odors occur, it may signal that filters need replacement. Always use Honeywell-recommended filters for optimal performance and warranty validity.
Advanced Features and Settings
Explore advanced features like Wi-Fi connectivity, allergen detection, and auto mode for smart air quality management. Customize settings to optimize performance and create a cleaner environment effortlessly.
7.1 Using Wi-Fi Connectivity
To connect your Honeywell air purifier to Wi-Fi, download the Honeywell Home app. Follow in-app instructions to link your device, enabling remote control, scheduling, and air quality monitoring. Ensure your router is compatible and the purifier is powered on. If issues arise, restart the unit and router, or refer to troubleshooting guides in the manual for assistance. This feature enhances convenience and smart home integration.
7.2 Allergen Detection and Auto Mode
Your Honeywell air purifier features allergen detection, automatically adjusting fan speed based on indoor air quality. In Auto Mode, sensors monitor pollutants and allergens, optimizing filtration for cleaner air. This intelligent system ensures efficient performance, capturing allergens like dust, pollen, and pet dander. Enable Auto Mode via the control panel or app for hands-free operation, letting the purifier adapt to your environment and maintain optimal air quality effortlessly.
7.3 Customizing Settings for Optimal Performance
Customize your Honeywell air purifier settings to enhance performance. Adjust fan speed manually or use pre-set modes like Turbo or Sleep. Enable the timer to run the purifier for specific durations. Utilize the remote control for convenient adjustments. For advanced models, connect via Wi-Fi to access additional settings through the app. These features allow you to tailor the unit to your space and preferences, ensuring efficient air cleaning and energy use while maintaining a comfortable environment.

Energy Efficiency and Cost Savings
Honeywell air purifiers are ENERGY STAR certified, ensuring energy efficiency. Using lower fan speeds and optimizing filter changes can help reduce energy consumption and lower utility bills.
8.1 Understanding Energy Consumption
Honeywell air purifiers are designed with energy efficiency in mind, often earning ENERGY STAR certification. Energy consumption varies based on fan speed, filter type, and usage duration. Lower fan speeds and intermittent operation reduce energy use. HEPA filters, while effective, may increase consumption slightly due to higher airflow resistance. Understanding these factors helps optimize energy usage for cost-effective performance.
8;2 Tips for Reducing Energy Costs
Honeywell air purifiers are energy-efficient, but optimizing usage can further reduce costs. Use lower fan speeds when possible, turn off the unit when not needed, and utilize timers or remote controls for convenience. Regular filter maintenance ensures optimal performance, reducing unnecessary energy consumption. Additionally, consider using the auto mode, which adjusts fan speed based on air quality, saving energy during cleaner conditions.
8.3 Eco-Friendly Features of Honeywell Air Purifiers
Honeywell air purifiers incorporate eco-friendly features to promote sustainability. Many models use energy-efficient motors and adhere to ENERGY STAR standards, reducing power consumption. Some units offer permanent washable pre-filters, minimizing waste by eliminating frequent replacements. Additionally, select models feature allergen and pollutant sensors, optimizing operation and energy use based on real-time air quality, making them both effective and environmentally responsible choices for home air cleaning.
Health Benefits and Air Quality Improvement
Honeywell air purifiers effectively reduce allergens, pollutants, and airborne pathogens, improving indoor air quality. They alleviate allergy and asthma symptoms, promoting a healthier living environment for all residents.
9.1 Reducing Allergens and Pollutants
Honeywell air purifiers are designed to capture 99.97% of airborne particles as small as 0.3 microns, effectively reducing allergens like dust, pollen, and pet dander. They also eliminate smoke, odors, and volatile organic compounds (VOCs), creating cleaner indoor air. By removing these pollutants, Honeywell air purifiers help minimize allergy and asthma triggers, promoting healthier breathing and a more comfortable living space for everyone.
9.2 Improving Indoor Air Quality
Honeywell air purifiers significantly enhance indoor air quality by removing up to 99.97% of airborne particles, including dust, pollen, and smoke. Their advanced filtration systems, such as True HEPA filters, ensure cleaner air circulation, reducing odors and contaminants for a fresher environment. This improvement creates a healthier and more comfortable living space, benefiting overall well-being and respiratory health.
9.3 Benefits for Asthma and Allergy Sufferers
Honeywell air purifiers are designed to remove allergens and irritants, providing relief for asthma and allergy sufferers. By capturing airborne particles like dust mites, pollen, and pet dander, these units create a cleaner environment that reduces symptoms like sneezing and congestion. Consistent use can lead to improved breathing and long-term health benefits for those prone to respiratory issues.

Additional Resources and Support
Visit Honeywell’s official website for comprehensive support, including manuals, FAQs, and customer service contact information to address any queries about your air purifier.
10.1 Accessing Honeywell Customer Support
Honeywell offers comprehensive customer support to address your air purifier needs. Call their toll-free number at 1-800-477-0457 for assistance. You can also email them at Posted in Manuals