Frindle‚ a charming novel by Andrew Clements‚ explores creativity and language through Nicholas Allen’s invention of a new word․ The PDF format enhances accessibility‚ making it ideal for classroom use and vocabulary building activities․ This engaging story highlights the power of imagination and critical thinking‚ appealing to young readers and educators alike․
1․1 Overview of the Book
Frindle‚ written by Andrew Clements‚ is a captivating story about Nicholas Allen‚ a creative fifth-grader who invents a new word‚ “frindle‚” to describe a pen․ This playful invention sparks a linguistic revolution in his school and community‚ exploring themes of creativity‚ language‚ and individual impact․ The book is both humorous and thought-provoking‚ appealing to young readers and educators alike․ Through Nicholas’s journey‚ Clements highlights the power of imagination and the unintended consequences of clever ideas․ The novel is celebrated for its engaging storyline and its ability to inspire critical thinking about the role of words in our lives․
1․2 Importance of the PDF Format
The PDF format of Frindle enhances accessibility‚ ensuring consistent text and illustration display across devices․ It simplifies sharing for educational use‚ benefiting both teachers and students․ PDFs facilitate vocabulary exercises and uniform study materials‚ aiding structured learning․ Additionally‚ PDFs can be adapted for assistive technologies‚ promoting inclusivity․ However‚ it’s crucial to use legally obtained copies to respect copyright laws‚ ensuring ethical access while maximizing the book’s educational potential․
Plot Summary of “Frindle”
Frindle follows Nicholas Allen‚ a creative fifth-grader who invents a new word‚ “frindle‚” to challenge his teacher․ The word spreads‚ causing chaos and sparking debates about language and authority‚ ultimately teaching Nicholas valuable lessons about creativity and responsibility․
2․1 The Creation of the Word “Frindle”
Nicholas Allen‚ a curious and inventive student‚ creates the word “frindle” during a lesson on dictionaries․ Frustrated with his teacher’s rigid approach‚ Nick decides to invent a new word for “pen․” He convinces his classmates to adopt “frindle‚” sparking a linguistic revolution․ The word’s creation showcases Nick’s creativity and his desire to challenge authority‚ setting the stage for a series of events that explore the power of language and innovation․ This clever act not only changes the classroom dynamic but also highlights the impact of individual actions on a community․
2․2 The Spread of “Frindle” in the School
The word “frindle” quickly gained momentum beyond Nicholas’s classroom․ Students embraced the term‚ using it in conversations and assignments‚ which sparked curiosity and excitement․ The school’s environment became a breeding ground for creativity as “frindle” replaced “pen” in everyday language․ Its popularity grew rapidly‚ with students eager to participate in the linguistic experiment․ The phenomenon reflected the power of collective action and the influence of a single idea on a community․ As “frindle” spread‚ it became a symbol of unity and innovation‚ showcasing how a simple word could transform the school’s culture and foster a sense of shared identity․
2․3 The Role of the Newspaper Article
The newspaper article played a pivotal role in amplifying the story of “frindle” beyond the school․ It brought the word to the attention of the broader community‚ highlighting its origins and significance․ The article not only validated Nicholas’s creation but also sparked curiosity and interest among readers․ Its publication marked a turning point‚ as “frindle” transitioned from a classroom experiment to a widely recognized term․ The article’s impact extended beyond the school‚ demonstrating how media can shape public perception and amplify creative ideas․ This coverage solidified “frindle” as a cultural phenomenon‚ showcasing the power of language and innovation․

Main Character Analysis
Nicholas Allen and Mrs․ Granger are central figures‚ showcasing creativity‚ authority‚ and the dynamic between student and teacher‚ driving the story’s themes of innovation and responsibility forward․
3․1 Nicholas Allen: The Creative Troublemaker
Nicholas Allen‚ the protagonist‚ is a clever and inventive student with a knack for creativity․ Known for turning his third-grade classroom into a tropical island‚ Nick consistently showcases his imaginative ideas․ His creation of the word “frindle” highlights his cleverness and ability to inspire others․ While his antics often challenge authority‚ especially Mrs․ Granger‚ his intentions are not malicious but rather driven by a desire to explore and innovate․ Nick’s dynamic with his teacher and classmates reveals his leadership qualities and how his creativity can both unite and disrupt the classroom environment․ His character embodies the spirit of innovation and youthful curiosity․
3․2 Mrs․ Granger: The Teacher’s Perspective
Mrs․ Granger‚ Nicholas Allen’s fifth-grade teacher‚ is a strict disciplinarian with a passion for language and grammar․ She values precision and order‚ often clashing with Nick’s creative antics․ Her initial disapproval of “frindle” stems from her belief in the importance of proper vocabulary and respect for authority․ However‚ as the story unfolds‚ her rigid demeanor softens slightly‚ revealing a teacher who cares deeply about her students’ learning․ Mrs․ Granger’s interactions with Nick highlight her commitment to education and her evolving perspective on creativity within a structured classroom environment․ Her character serves as a foil to Nick’s inventive nature‚ adding depth to the narrative․
Themes and Lessons
Frindle explores themes of creativity‚ individuality‚ and the power of language‚ emphasizing how words can shape perceptions and communities․ It highlights the impact of innovative thinking and perseverance․
4․1 The Power of Creativity and Words
In Frindle‚ Nicholas Allen’s invention of the word “frindle” showcases the transformative power of creativity and language․ His simple act of renaming a pencil sparks a linguistic revolution‚ demonstrating how words can shape culture and perception․ The novel illustrates that creativity is not just about art but also about problem-solving and challenging norms․ Through Nick’s journey‚ readers learn that even the smallest idea can have a profound impact when nurtured with imagination and determination․ Clements highlights how words‚ as tools of expression‚ can unite communities and inspire change‚ making language a powerful catalyst for innovation and growth․
4․2 The Impact of Individual Actions on a Community
Nicholas Allen’s creation of “frindle” demonstrates how individual actions can ripple through a community‚ sparking widespread change․ His invented word spreads rapidly‚ uniting students and challenging authority‚ showing how one person’s idea can inspire collective action․ The novel illustrates that even small actions can have profound effects‚ reshaping social dynamics and fostering a sense of identity among group members․ This highlights the potential for individuals to drive change and the importance of considering how personal choices may influence others and the community at large․

Educational Value of “Frindle”
The book fosters creativity‚ problem-solving‚ and critical thinking‚ while encouraging an appreciation for language evolution․ It provides engaging lessons on vocabulary and the impact of words in society․
5․1 Vocabulary Building Activities
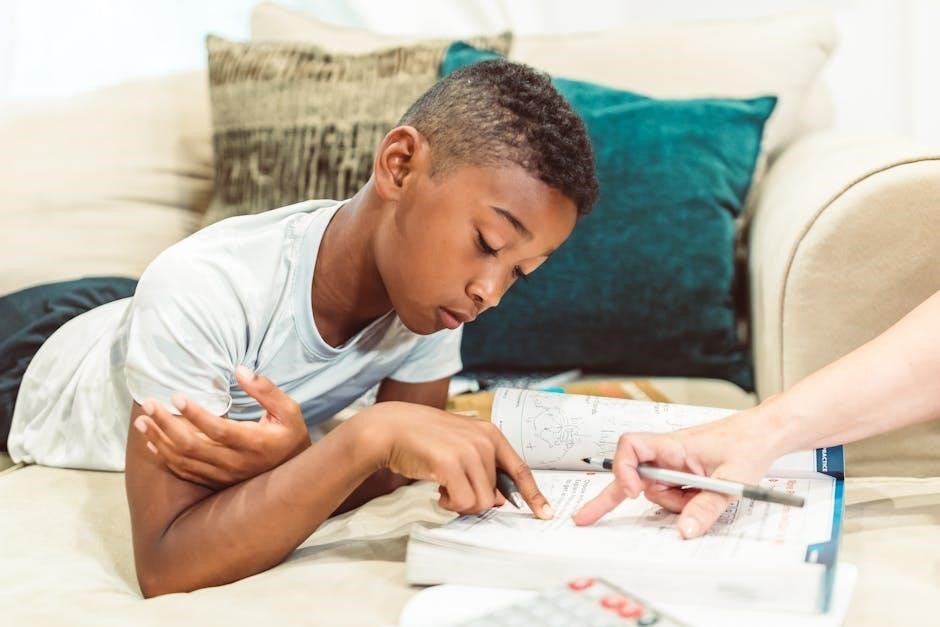
The Frindle book PDF offers a wealth of opportunities for vocabulary building․ Teachers can introduce key terms like “frindle” itself‚ encouraging students to explore word origins and meanings․ Activities such as creating word journals or crossword puzzles can deepen understanding․ The story’s focus on language invention also prompts discussions on how words evolve‚ fostering curiosity and linguistic awareness․ By engaging with the text‚ students not only expand their vocabulary but also develop critical thinking skills․ The PDF format makes it easy to incorporate these exercises into classroom lessons‚ ensuring a fun and interactive learning experience for young readers․
5․2 Encouraging Critical Thinking and Imagination
The Frindle book PDF inspires students to think creatively by exploring the power of words and their impact on communication․ Activities such as inventing new words or imagining alternative endings encourage imaginative thinking․ The story prompts discussions on problem-solving and the consequences of creative actions․ Teachers can use the PDF to design brainstorming sessions or reflective writing exercises‚ fostering critical thinking․ The narrative’s focus on innovation motivates students to explore their own ideas‚ making it a valuable tool for nurturing creativity and analytical skills in the classroom․ This engaging approach helps students connect with the story on a deeper level․

Reading Level and Audience
Frindle is written at a middle-grade reading level‚ making it accessible to upper elementary students․ Its themes of creativity and problem-solving appeal to children aged 8–12‚ while the PDF format supports classroom use and learning activities․
6․1 Determining the Reading Level
Frindle is written at a middle-grade reading level‚ making it accessible to upper elementary students․ The novel’s vocabulary and sentence structure are simple yet engaging‚ suitable for readers aged 8–12․ The PDF format allows educators to easily assess and utilize the text for classroom activities‚ ensuring it aligns with curriculum standards․ The book’s themes of creativity and problem-solving further enhance its educational value‚ making it an ideal choice for developing critical thinking and imagination in young learners while supporting language arts instruction․
6․2 Suitability for Different Age Groups
Frindle is primarily suited for middle-grade readers‚ aged 8 to 12‚ due to its engaging storyline and accessible language․ The PDF format enhances its classroom use‚ making it ideal for educational settings․ While younger readers may find the vocabulary challenging‚ guided reading can help them enjoy the story․ Older readers‚ particularly those who appreciate themes of creativity and individuality‚ may also find the book appealing․ The book’s inventive plot and relatable protagonist make it suitable for both independent reading and group discussions‚ catering to a broad range of readers within its target age group․

Availability of “Frindle Book PDF”
The Frindle book PDF is widely available online through various sources‚ including educational platforms and libraries․ Legal downloads ensure access to the full text securely․
7․1 Sources for Free PDF Downloads
Free PDF downloads of Frindle can be found on educational platforms‚ online libraries‚ and file-sharing sites․ Websites like PDF Drive or Google Books may offer limited previews․ However‚ users must verify the legality and safety of such downloads‚ as unauthorized distribution may infringe on copyrights․ Schools and libraries often provide legitimate access through their databases․ Always ensure downloads are from trusted sources to avoid malware or legal issues․ Additionally‚ platforms like Teachers Pay Teachers or educational forums may share resources‚ though the full book may require purchase․ Prioritize legal access to support authors and publishers․
7․2 Legal and Ethical Considerations
Downloading Frindle as a PDF from unauthorized sources raises legal and ethical concerns․ Copyright laws protect authors and publishers‚ making it illegal to distribute books without permission․ Accessing pirated copies undermines the publishing industry and deprives creators of fair compensation․ Ethically‚ supporting legal purchases ensures writers continue producing quality literature․ Schools and libraries offer legitimate access‚ promoting lawful consumption․ Always prioritize purchasing or borrowing from authorized sources to respect intellectual property rights and contribute to the literary community’s sustainability․ Legal alternatives not only protect rights but also provide high-quality‚ virus-free content for an optimal reading experience․
Author Background
Andrew Clements‚ born in 1949‚ was an American author known for engaging school stories․ His teaching experience inspired works like Frindle‚ reflecting his passion for education and creativity․
8․1 Andrew Clements: The Creator of “Frindle”
Andrew Clements‚ born in 1949‚ was a celebrated American author known for his captivating school-based novels․ Before becoming a full-time writer‚ Clements worked as a teacher and a songwriter‚ experiences that deeply influenced his writing․ His novel Frindle showcases his ability to craft relatable and imaginative stories for young readers․ Clements’ unique voice and humor have made his books beloved in classrooms and homes alike․ His works often explore themes of creativity‚ individuality‚ and the power of words‚ resonating with both children and educators․ Clements’ legacy continues to inspire new generations of readers and writers․
8․2 His Other Works and Contributions
Andrew Clements’ literary contributions extend far beyond Frindle․ He authored numerous beloved books‚ including The Landry News‚ The School Story‚ and The Report Card․ Clements’ works often explored school life‚ highlighting themes of creativity‚ perseverance‚ and the student-teacher dynamic․ His ability to blend humor with meaningful lessons made his stories resonate with young readers․ Clements also emphasized the importance of vocabulary and imagination‚ often incorporating these elements into his narratives․ His contributions to children’s literature have left a lasting impact‚ making him a cherished author among educators and students alike․
The Legacy of “Frindle”
Frindle remains a timeless tale‚ inspiring creativity and linguistic exploration․ Its legacy is further celebrated in The Frindle Files‚ a heartfelt continuation of Nicholas Allen’s story․
9․1 Impact on Young Readers
Frindle has captivated young readers‚ fostering creativity and a deeper appreciation for language․ Its whimsical story encourages children to explore the power of words and their meanings‚ sparking curiosity and imagination․ The book’s themes of innovation and responsibility resonate deeply‚ teaching kids about the impact of their actions․ By engaging with Nicholas Allen’s journey‚ young readers develop critical thinking skills and a love for storytelling․ The novel’s accessibility and relatable characters make it a cherished read‚ inspiring a new generation to embrace vocabulary building and creative expression․ Its legacy continues to empower young minds‚ leaving a lasting impression on their educational and personal growth․
9․2 The “Frindle Files” and Its Significance
The Frindle Files‚ a companion to the original novel‚ offers a fresh perspective on the story’s legacy․ As a final gift from Andrew Clements‚ it captures the timeless essence of creativity and community․ This collection deepens the narrative‚ exploring themes of resilience and innovation․ It connects seamlessly with the original book‚ highlighting the enduring impact of Nicholas Allen’s invention․ The Frindle Files engages a new generation‚ encouraging them to reflect on the power of words and their role in shaping the world․ Its significance lies in its ability to inspire young readers to think creatively about language and its possibilities‚ ensuring the story’s relevance for years to come․
Frindle remains a timeless tale of creativity and innovation‚ inspiring young minds to embrace language and imagination․ Its relevance endures‚ making it a cherished read for generations․
10․1 Final Thoughts on the Book’s Relevance
Frindle remains a timeless and engaging story‚ offering valuable lessons on creativity‚ language‚ and community impact․ Its themes of innovation and individuality continue to resonate with readers of all ages․ The book’s ability to spark critical thinking and imagination makes it a cherished resource in educational settings․ By exploring the power of words‚ Frindle encourages readers to think beyond boundaries and embrace their unique ideas․ Its relevance in today’s world is undeniable‚ as it fosters a deeper appreciation for language and creativity‚ making it a beloved and enduring read for generations․