Choosing the right round mirror size is crucial for functionality and style. This guide helps you select the perfect diameter‚ ensuring your space feels balanced and visually appealing.
1.1 Importance of Choosing the Right Round Mirror Size
Choosing the right round mirror size is essential for both functionality and aesthetics. A mirror that is too small may lack practicality‚ while one that is too large can overwhelm the space. The correct size enhances reflection‚ creates balance‚ and complements the room’s decor. Proper sizing ensures the mirror aligns with furniture dimensions and personal style‚ making it a harmonious addition to any setting. This guide helps you make informed decisions to achieve the perfect fit for your needs.
1.2 Overview of the Guide
This guide provides a comprehensive approach to selecting the ideal round mirror size for various spaces. It explores key factors like room dimensions‚ furniture proportions‚ and personal style. The guide offers tailored recommendations for bathrooms‚ living rooms‚ bedrooms‚ and hallways. It also covers general size ranges‚ measurement techniques‚ and placement strategies. Additionally‚ it discusses frame styles‚ common mistakes to avoid‚ and current trends. By following this guide‚ you’ll be equipped to make informed decisions and find the perfect mirror to enhance your space.

Key Factors Influencing Round Mirror Size
Room dimensions‚ furniture proportions‚ and personal style are key factors influencing round mirror size‚ ensuring functionality and aesthetic harmony.
2.1 Room Size and Layout
The size and layout of your room significantly impact the choice of round mirror size. A larger room can accommodate bigger mirrors without overwhelming the space‚ while smaller rooms benefit from smaller‚ more proportionate mirrors. The mirror’s diameter should complement the room’s dimensions‚ ensuring it doesn’t dominate the area. For example‚ a 24-36 inch mirror is ideal for medium-sized rooms‚ creating a balanced look without overwhelming the space.
2.2 Furniture and Wall Dimensions
Furniture and wall dimensions play a crucial role in determining the ideal round mirror size. The mirror should complement the size of the furniture it is placed above‚ such as a vanity or console table. A general rule is to choose a mirror that is 70-80% of the furniture’s width. Additionally‚ consider the wall space to ensure the mirror fits proportionally‚ avoiding overcrowding. Measure the wall area and furniture dimensions carefully to select a mirror that enhances the room’s harmony without appearing too small or overwhelming.
2.3 Personal Preference and Aesthetic Goals
Personal preference and aesthetic goals significantly influence the choice of round mirror size. Some prefer minimalist designs‚ while others opt for bold‚ statement pieces. Consider the desired visual impact‚ whether it’s to create a focal point or blend seamlessly into the decor. Current trends include mixing sizes for a collage effect or choosing oversized mirrors for drama. Ultimately‚ the size should reflect your style and complement the room’s ambiance‚ ensuring a harmonious balance between functionality and visual appeal.
Guidelines for Different Rooms
Mirror size varies by room. Bathrooms require mirrors at least the size of the sink‚ while living rooms benefit from mirrors sized to furniture below. Hallways prefer smaller mirrors for cohesion.
3.1 Bathroom Mirrors
Bathroom mirrors should complement the vanity and sink size. For small vanities‚ 18-24 inches is ideal‚ while medium vanities suit 24-36 inches. Larger bathrooms can accommodate mirrors over 36 inches. Ensure the mirror is at least as wide as the sink and no wider than the vanity. Position it centrally above the sink‚ at eye level‚ and leave space for lighting fixtures. Round mirrors add a modern touch‚ but consider frame styles that match your bathroom decor for a cohesive look.
3.2 Living Room Mirrors
Round mirrors in living rooms add elegance and depth. Choose a size that complements the space and furniture. For a sofa or fireplace mantel‚ opt for a mirror 25-50% narrower than the furniture below. A 24-36 inch mirror works well for smaller rooms‚ while 36-48 inches creates a statement in larger spaces. Place it centrally above the sofa or fireplace‚ ensuring visual balance. Larger mirrors can act as focal points‚ while smaller ones provide subtle accents‚ enhancing the room’s aesthetic without overwhelming it.
3.3 Bedroom Mirrors
Round mirrors in bedrooms can enhance intimacy and light reflection. For smaller bedrooms‚ an 18-24 inch mirror works well above a dresser or bed. Larger bedrooms can accommodate 24-36 inch mirrors‚ adding a touch of elegance. Place the mirror centrally above furniture for balance. Consider proportions to avoid overwhelming the space‚ ensuring the mirror complements the room’s decor without dominating it. Leaving space around the mirror creates a harmonious aesthetic‚ making the room feel serene and well-designed.
3.4 Hallway and Entryway Mirrors
Round mirrors in hallways and entryways add a welcoming touch without overwhelming the space. For narrow hallways‚ opt for a small to medium-sized mirror (18-24 inches). In larger entryways‚ a 24-36 inch mirror works well. Place the mirror at a comfortable height for visibility. Ensure it leaves enough space around it for a balanced look. A round mirror in these areas enhances light reflection and creates a sense of openness‚ making the space feel more inviting and functional for quick checks or decorative appeal.
General Size Ranges for Round Mirrors
Round mirrors come in various sizes to fit different spaces. Small mirrors (18-24 inches) are ideal for tight areas‚ medium (24-36 inches) for balanced decor‚ large (36-48 inches) for statement pieces‚ and extra-large (over 48 inches) for grand focal points.
4.1 Small Round Mirrors (18-24 inches)
Small round mirrors‚ ranging from 18 to 24 inches in diameter‚ are perfect for compact spaces like small bathrooms or entryways; They provide ample reflection without overwhelming the area. These mirrors are ideal for vanity setups‚ as they should be at least as wide as the sink below. Their modest size complements minimalistic interiors and adds a touch of elegance to tight spaces. For optimal placement‚ ensure the mirror is centered and consider visual spacing around it to enhance its decorative impact while maintaining balance in the room.
4.2 Medium Round Mirrors (24-36 inches)
Medium round mirrors‚ measuring 24 to 36 inches‚ are versatile and suit various areas. They work well in bathrooms‚ bedrooms‚ and living rooms‚ offering a balanced look. These mirrors are large enough to be focal points but not overwhelming. For instance‚ a 24-inch mirror is ideal for smaller vanities‚ while a 36-inch piece complements medium-sized rooms. When placed above furniture‚ ensure the mirror is 25-50% narrower than the piece below. This size range enhances decor without dominating the space‚ making it a practical and stylish choice for many settings.
4.3 Large Round Mirrors (36-48 inches)
Large round mirrors‚ spanning 36 to 48 inches‚ create a striking presence in any room. They are ideal for spacious areas like living rooms or entryways‚ serving as focal points. A 36-inch mirror can accentuate a room’s decor‚ while a 48-inch piece adds drama and light. These mirrors are perfect for making rooms feel larger and brighter. Place them above furniture or walls‚ ensuring they are proportionate to the space. This size range offers a bold‚ elegant solution for enhancing interior aesthetics and functionality.
4.4 Extra-Large Round Mirrors (48 inches and above)
Extra-large round mirrors‚ measuring 48 inches or more‚ make a grand statement in expansive spaces. Ideal for large living rooms‚ entryways‚ or even outdoor areas‚ these mirrors create a sense of luxury and openness. Their size allows them to serve as focal points‚ reflecting light and enhancing the ambiance. When placed above grand fireplaces or expansive walls‚ they add sophistication and elegance. Ensure proportional placement to avoid overwhelming the space‚ as these mirrors are designed to complement large-scale decor and create a dramatic visual impact.
How to Measure for a Round Mirror
Measuring for a round mirror involves determining the right size for your space‚ ensuring proper fit‚ and enhancing room aesthetics. Use tools like a tape measure…
5.1 Measuring the Diameter
Measuring the diameter of a round mirror ensures it fits your space perfectly. Use a tape measure to determine the width of the area where the mirror will hang. Consider the room’s proportions and the furniture below. For example‚ a mirror above a sink should be at least the size of the sink and no wider than the surrounding area. Measure carefully to avoid overwhelming the space‚ ensuring the mirror complements the room’s aesthetics without dominating it.
5.2 Considering Visual Spacing
Visual spacing is crucial for a balanced look. Ensure the mirror is proportionate to the room‚ leaving at least 24 inches of space around it. Avoid overwhelming the area by keeping the mirror no wider than the furniture or wall it hangs above. For example‚ a mirror above a sink should be at least the size of the sink but not excessively large. This creates harmony and prevents the space from feeling cluttered or visually overwhelming.
5.3 Tools Needed for Measurement
To measure effectively‚ you’ll need a tape measure for diameter and wall space. A level ensures proper alignment‚ while a pencil marks the wall. Use masking tape to visualize placement without damage. These tools help achieve accurate measurements and a balanced look‚ ensuring your mirror fits seamlessly into the space. Proper measurement tools are essential for a successful installation and desired aesthetic impact.
Visual Spacing and Placement
Ensure your round mirror is 70-80% of the furniture’s width and leave at least 24 inches of space around it for a balanced‚ visually appealing arrangement.
6.1 Leaving Space Around the Mirror
Leaving adequate space around a round mirror ensures it complements the room without overwhelming it. Aim for at least 24 inches of clearance on all sides to create a balanced look. This rule applies to both small and large mirrors‚ as it enhances visual harmony. For smaller spaces‚ maintain a minimum of 6 inches around the mirror‚ while larger rooms can accommodate more generous spacing. Proper spacing highlights the mirror’s design and prevents the area from feeling cluttered.
6.2 Placement Above Furniture
When placing a round mirror above furniture‚ such as a sofa or fireplace mantel‚ it’s essential to choose a size that complements the piece without overwhelming it. A general rule is to select a mirror that is 25-50% narrower than the width of the furniture below it to maintain balance. For example‚ if your sofa is 84 inches wide‚ opt for a mirror that is 52-67 inches in diameter. Additionally‚ leave at least 24 inches of space between the top of the furniture and the bottom of the mirror to create a visually appealing arrangement. This ensures the mirror enhances the room’s decor without appearing too large or out of place‚ fostering a harmonious and polished aesthetic.
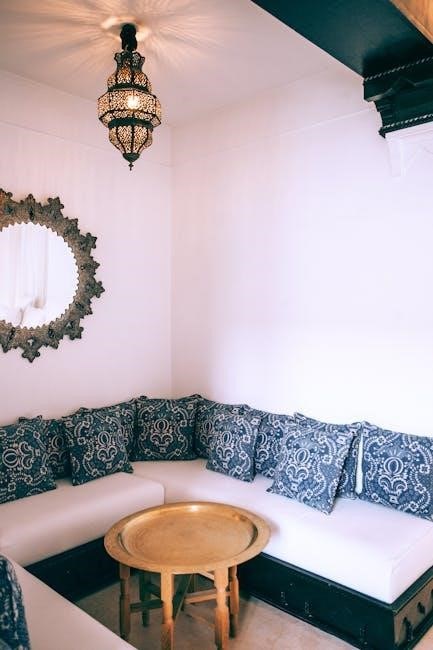
6.3 Symmetry and Balance
Symmetry and balance are key to creating a visually pleasing space. When placing a round mirror‚ center it above furniture to maintain equilibrium. The mirror’s size should be proportional to the surrounding elements‚ avoiding overpowering the room. Ensure the mirror is 70-80% the width of the furniture or wall it sits above‚ leaving adequate visual spacing around it. This harmonious arrangement enhances the room’s aesthetic‚ creating a sense of calm and balance while reflecting light effectively;
Choosing the Right Frame Style
Frame styles significantly impact a mirror’s aesthetic. Frameless mirrors offer a sleek‚ modern look‚ while framed options add texture and complement room decor‚ enhancing the overall style.
7.1 Frameless vs. Framed Mirrors
Frameless round mirrors offer a sleek‚ minimalist appearance‚ blending seamlessly into modern spaces. Framed mirrors‚ however‚ provide a decorative edge‚ with options like brass or iron finishes adding elegance. Consider the room’s style: frameless for simplicity and framed for a statement. Both options enhance functionality but cater to different aesthetic goals‚ ensuring a perfect match for any interior design. Choose based on whether you prefer subtle sophistication or bold decor accents.
7.2 Impact of Frame Size on Overall Appearance
The frame size significantly influences a round mirror’s visual impact. A wide frame can make the mirror appear larger‚ adding a bold statement‚ while a slim frame creates a subtle look. The proportion of the frame to the mirror’s diameter is key—ensuring balance without overwhelming the space. Additionally‚ the frame’s finish and style must complement the room’s decor‚ enhancing the mirror’s functionality and aesthetic appeal. Properly scaled frames elevate the mirror’s role as both a functional and decorative element in any setting.
7.3 Matching Frame Style to Room Decor
Matching the frame style to your room decor ensures a cohesive look. Modern spaces often pair well with sleek‚ minimalist frames‚ while traditional settings benefit from ornate or carved designs. Rustic themes align with natural wood or distressed finishes. Consider the room’s color palette and existing furniture when selecting a frame. For example‚ a brass frame complements warm tones‚ while a black frame suits industrial aesthetics. The frame should enhance the mirror’s functionality while harmonizing with the room’s overall style and ambiance‚ creating a polished and intentional design.

Common Mistakes to Avoid
Common mistakes include choosing mirrors too small or too large‚ ignoring visual spacing‚ and not considering room decor‚ which can overwhelm or disrupt balance. Careful selection is key for harmony.
8.1 Choosing a Mirror Too Small for the Space
Selecting a round mirror that is too small can make a room feel unbalanced and functional needs unmet. A mirror that’s too petite may not provide adequate reflection‚ especially in bathrooms or entryways where visibility is key. For small vanities‚ an 18-24 inch mirror is ideal‚ while larger spaces require bigger diameters. Measuring the area and considering the mirror’s purpose can help avoid this common error‚ ensuring the mirror complements the space rather than appearing lost within it.
8.2 Overwhelming the Room with a Large Mirror
A mirror that is too large for the space can overwhelm the room‚ creating a cramped or cluttered feel. While large mirrors can be statement pieces‚ their size should align with the room’s proportions. For instance‚ a 48-inch mirror is ideal for larger spaces‚ but in smaller rooms‚ it may dominate the area. Ensuring the mirror’s diameter is proportional to the wall or furniture it accompanies helps maintain balance. Ignoring this guideline can disrupt the room’s harmony and functionality.
8.3 Ignoring the Importance of Proportion
Overlooking proportion is a common mistake when selecting a round mirror. A mirror that is too small may feel insignificant‚ while one that is too large can overwhelm the space. The mirror’s size should align with the room’s dimensions and the furniture it accompanies. For example‚ a round mirror in a small bathroom should be between 18-24 inches‚ while larger spaces can accommodate mirrors up to 48 inches or more. Always consider the 70-80% rule relative to the wall or furniture width to maintain balance and harmony in the room’s design. Proper measurement is key to avoiding this error.
Popular Round Mirror Sizes and Uses
Popular round mirror sizes include 24-inch for small spaces‚ 36-inch for living rooms‚ and 48-inch for large areas‚ each serving functional and decorative purposes effectively.
9.1 24-inch Round Mirror
A 24-inch round mirror is ideal for small spaces like bathrooms or hallways. It provides sufficient reflection without overwhelming the area‚ making it perfect for vanity setups or accent walls. This size works well in compact rooms‚ adding a touch of elegance without dominating the space. It’s also popular for creating a balanced look in smaller vanities‚ ensuring functionality and style.
9.2 36-inch Round Mirror
A 36-inch round mirror is a versatile choice‚ suitable for medium-sized rooms. It works well in living areas or bedrooms‚ adding a statement piece that enhances light reflection and creates a sense of openness. This size is ideal for larger vanities or as a focal point in hallways. Its moderate diameter ensures it complements the space without overwhelming it‚ making it a popular choice for balanced decor in various settings.
9.3 48-inch Round Mirror
A 48-inch round mirror is an excellent choice for making a bold statement in larger rooms. Its substantial size creates a striking focal point‚ ideal for spaces like living rooms‚ entryways‚ or expansive bedrooms. This mirror enhances natural light reflection and adds a sense of openness. It pairs well with large furniture or walls‚ ensuring proportion and balance. Consider pairing it with a decorative frame to complement the room’s decor‚ ensuring it doesn’t overwhelm the space while maintaining visual harmony and elegance.

Current Trends in Round Mirror Sizing
Current trends favor minimalist designs‚ oversized statement pieces‚ and mixing sizes for a collage effect. Seasonal themes also influence mirror size choices‚ ensuring modern aesthetics align with space dynamics.
10.1 Minimalist vs. Statement Pieces
In contemporary design‚ round mirrors are often used as minimalist accents or bold statement pieces. Minimalist styles opt for smaller diameters‚ like 24-36 inches‚ blending subtly into the decor. Conversely‚ statement pieces‚ often 48 inches or larger‚ dominate the space‚ creating focal points. The choice between these styles depends on the desired aesthetic impact‚ with minimalism offering understated elegance and statements delivering dramatic flair‚ each enhancing room dynamics uniquely. Both approaches emphasize proportion and balance‚ ensuring mirrors complement their surroundings effectively.
10.2 Mixing Sizes for a Collage Effect
Mixing round mirror sizes creates a visually striking collage effect‚ adding depth and texture to any room. This trend involves arranging multiple mirrors of varying diameters to form a dynamic focal point. Small‚ medium‚ and large mirrors can be combined to create a balanced yet eclectic look. Start with a large mirror as the centerpiece and surround it with smaller ones‚ ensuring spacing is consistent to avoid clutter. This approach enhances visual interest and can make a space feel larger‚ offering endless possibilities for creativity and personal style. Proper alignment and balance are key to achieving a cohesive design.
10.3 Seasonal and Thematic Trends
Seasonal and thematic trends influence round mirror size choices‚ with designs adapting to current styles. For instance‚ summer may favor smaller‚ minimalist mirrors‚ while winter might lean toward larger‚ statement pieces. Thematic trends‚ like coastal or industrial aesthetics‚ also shape preferences‚ with sizes selected to complement decor. These trends encourage versatility‚ allowing mirrors to align with specific styles or occasions‚ ensuring they remain a timeless yet adaptable element in home design and decoration. This approach keeps spaces fresh and aligned with evolving fashion.