jbl headphones manual

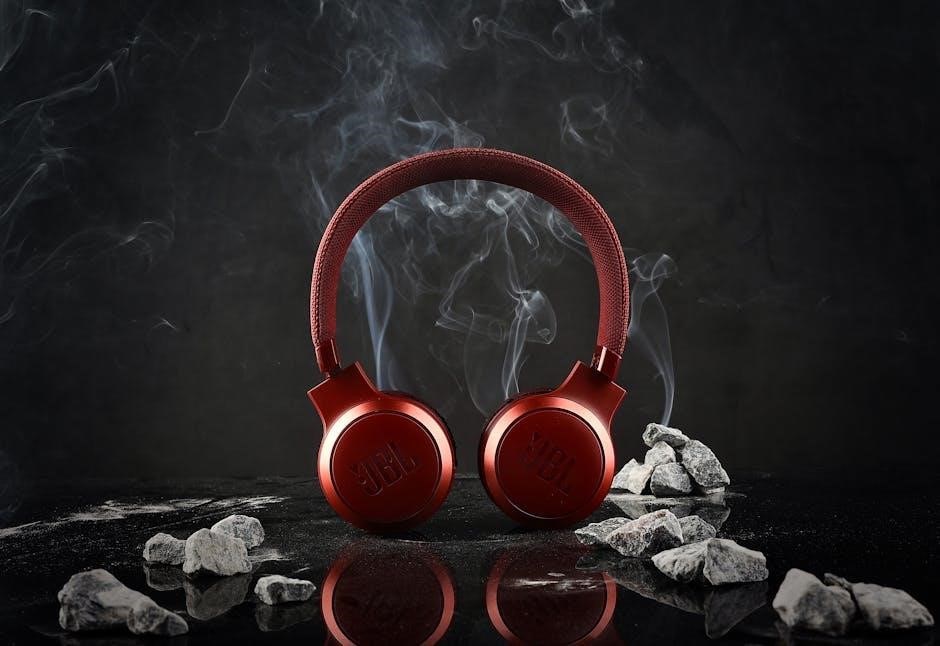
Welcome to the JBL Headphones Manual! This guide helps you navigate setup‚ features‚ and troubleshooting for optimal performance. Explore detailed instructions to enhance your audio experience.

1.1 Understanding the Importance of the Manual

The JBL Headphones Manual is your gateway to unlocking the full potential of your audio experience. This guide provides essential insights into setting up‚ customizing‚ and maintaining your headphones. From troubleshooting common issues to understanding advanced features‚ the manual ensures you maximize performance and longevity. By following the instructions‚ you can resolve connectivity problems‚ optimize sound quality‚ and explore additional functionalities like noise cancellation and multi-device pairing. Referencing the manual regularly helps you make the most of your JBL headphones and enjoy a seamless listening experience.

1.2 Overview of JBL Headphones Features

JBL headphones are renowned for their superior sound quality‚ sleek designs‚ and innovative technology. Key features include noise cancellation‚ Bluetooth connectivity‚ and customizable sound settings via the JBL app. Many models offer multi-device pairing‚ voice assistant integration‚ and water resistance‚ making them versatile for various lifestyles. With long battery life and comfortable wear‚ JBL headphones cater to both casual listeners and audiophiles. Explore these features to elevate your listening experience with JBL’s cutting-edge audio solutions.

Installation and Setup

This section guides you through unboxing‚ physical inspection‚ and initial setup of JBL headphones. Learn how to connect devices‚ pair via Bluetooth‚ and charge batteries properly.

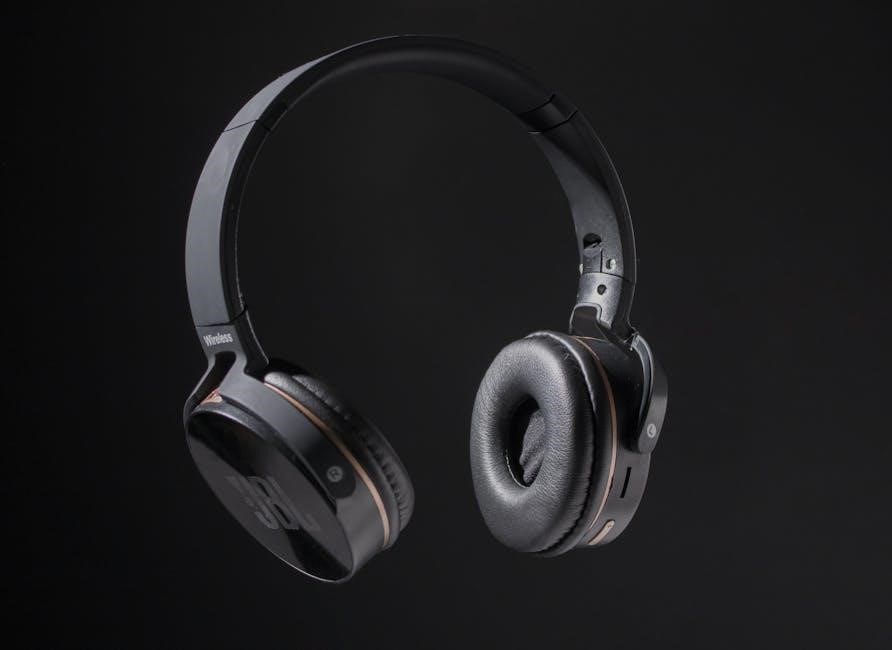
2.1 Unboxing and Physical Inspection

Carefully unbox your JBL headphones and inspect for damage. Check included accessories like cables‚ chargers‚ and ear cushions. Ensure all components are in perfect condition. Familiarize yourself with the design‚ controls‚ and ports. Verify the build quality and proper functioning of moving parts. This step ensures your headphones are ready for setup and provides a smooth user experience. Always handle your headphones with care to maintain durability and performance. Follow these steps to avoid any initial issues.

2.2 Connecting JBL Headphones to Devices

To connect your JBL headphones‚ start by enabling Bluetooth on your device. Put the headphones in pairing mode—typically done by holding the power button until the LED flashes. Select the JBL device from your device’s Bluetooth list. For wired connections‚ use a 3.5mm audio cable. Ensure the cable is securely plugged into both the headphones and the device. Some models may require specific settings or app configurations for optimal connectivity. Always verify the connection status with the device’s LED indicators or audio cues. Troubleshoot by restarting both devices if needed.

2.3 Bluetooth Pairing Process

To pair your JBL headphones via Bluetooth‚ power them on and locate the pairing button. Press and hold this button until the LED light flashes blue‚ indicating pairing mode. On your device‚ go to Bluetooth settings and select your JBL headphones from the available options. Once connected‚ the LED light will stabilize. If prompted‚ confirm the pairing. For subsequent connections‚ your device should automatically reconnect. If issues arise‚ restart both devices or reset the headphones by holding the pairing button for 10-15 seconds. Ensure your device’s Bluetooth is updated for compatibility.

2.4 Initial Battery Charging

Before using your JBL headphones‚ charge the battery fully using the provided USB cable. Connect the cable to the charging port‚ typically located on the earcup. Allow 2-3 hours for a complete charge. The LED indicator will turn from red to blue or green when charging is complete. Avoid using fast chargers to prevent damage. After the first charge‚ the headphones should hold a full charge for several hours. For optimal performance‚ drain the battery to 0% and recharge fully before regular use. This ensures proper battery calibration.

Operating the Headphones

Learn how to control your JBL headphones‚ adjust settings‚ and utilize features like noise cancellation and device switching for an enhanced listening experience.

3.1 Basic Controls and Functions

Mastering the basic controls and functions of your JBL headphones ensures a seamless experience. Use the power button to turn them on or off. Adjust volume with the plus and minus buttons. Play or pause music with the center control. Skip tracks by holding the volume buttons. Answer calls with a single tap and end them with another. Pairing mode is activated by holding the power button until the LED flashes. Familiarize yourself with these features to optimize your daily use.

3.2 Adjusting Sound Settings

Customize your audio experience by adjusting sound settings on your JBL headphones. Use the JBL app to access equalization options‚ enhancing bass‚ treble‚ or midrange frequencies. Enable noise cancellation to minimize external disturbances. Adjust volume levels using the on-ear controls or connected device. For immersive sound‚ activate surround sound modes if available. Experiment with presets like bass boost or cinema mode to match your listening preferences. Save custom profiles for quick access‚ ensuring your audio experience is tailored to your liking. Regularly update the app for new sound features and improvements.

3.3 Using Noise Cancellation Features

Activate noise cancellation on your JBL headphones to immerse yourself in pure audio. Enable ANC via the app or dedicated button. Choose between ambient sound mode to stay aware or full ANC for complete isolation. Customize noise cancellation levels in the JBL app. Optimized for both low and high-frequency sounds‚ ANC ensures clarity and detail in any environment. Use adaptive noise cancellation for dynamic adjustments based on surroundings. This feature is perfect for commuting‚ work‚ or relaxation‚ providing a distraction-free listening experience. Ensure ANC is updated with the latest firmware for enhanced performance and reliability.

3.4 Switching Between Devices

Effortlessly switch between devices using your JBL headphones. For seamless transitions‚ ensure both devices are paired via Bluetooth. Use the multi-device connectivity feature to connect up to two devices simultaneously. To switch‚ pause playback on the current device and start on the other. The headphones will automatically switch to the active audio source. For manual switching‚ access the Bluetooth settings on the desired device and select your JBL headphones; This feature is ideal for multitasking‚ allowing you to manage calls‚ music‚ and work effortlessly. Ensure your headphones are updated for smooth device switching.

Advanced Features

Explore advanced features like customizable sound via the JBL app‚ multi-device connectivity‚ voice assistant integration‚ and water resistance for enhanced functionality and convenience.

4.1 Customizing Sound with JBL App

The JBL app offers a customizable sound experience. Adjust equalizer settings to tailor bass‚ midrange‚ and treble to your preference. Save custom profiles for different genres or listening modes‚ ensuring optimal audio quality in any situation. Additionally‚ the app provides firmware updates and noise-cancellation adjustments‚ enhancing your headphones’ performance and personalization. This feature empowers users to fine-tune their audio preferences‚ making every listening session uniquely enjoyable and tailored to their tastes.

4.2 Multi-Device Connectivity

JBL headphones support multi-device connectivity‚ allowing seamless switching between up to two connected devices. This feature is ideal for users who need to transition between their phone‚ laptop‚ or other Bluetooth-enabled devices. To switch‚ simply pause playback on one device and resume on the other. The headphones automatically prioritize the active device‚ ensuring uninterrupted audio. This functionality enhances convenience and flexibility‚ making it easier to manage multiple sources without disconnecting or re-pairing devices.

4.3 Voice Assistant Integration

JBL headphones integrate seamlessly with popular voice assistants like Siri and Google Assistant. Access your voice assistant with a single button press‚ enabling hands-free control for music‚ calls‚ and information. This feature enhances convenience‚ allowing you to manage tasks effortlessly. Ensure your device supports the voice assistant and follow pairing instructions in the manual for optimal functionality. Voice assistant integration elevates your listening experience‚ making it smarter and more intuitive.

4.4 Water and Dust Resistance

JBL headphones feature advanced water and dust resistance‚ perfect for active lifestyles. Models like the JBL Reflect Aero boast an IP68 rating‚ offering superior protection against dust and water immersion. This ensures durability in challenging environments. While resistant‚ avoid exposing your headphones to excessive moisture or harsh conditions unnecessarily. Regular cleaning and proper storage are recommended to maintain resistance. Refer to the manual for specific care instructions to preserve your headphones’ longevity and performance.

Maintenance and Care

Regularly clean your JBL headphones to maintain sound quality and hygiene. Store them properly in a protective case to prevent damage and extend lifespan effectively.

5.1 Cleaning the Headphones

Regular cleaning ensures optimal sound quality and longevity. Use a soft‚ dry cloth to wipe the exterior and ear cushions. For stubborn stains‚ dampen the cloth slightly but avoid liquid contact. Gently remove dirt from the headband and speakers using a clean‚ dry brush. Never use harsh chemicals or abrasive materials‚ as they may damage the finish or components. After cleaning‚ allow the headphones to air dry before storing them in a protective case. This routine maintains hygiene and preserves the headphones’ performance.

5.2 Storing the Headphones Properly

Proper storage is essential to maintain the quality and longevity of your JBL headphones. Store them in a protective case or pouch to prevent scratches and dust accumulation. Avoid folding or bending the headband excessively‚ as this may cause damage. Place the headphones in a cool‚ dry environment‚ away from direct sunlight and moisture. Never store them in extreme temperatures or humid conditions‚ as this can harm the electrical components and materials. Always ensure the headphones are completely dry before storing to prevent mold or corrosion.

5.3 Updating Firmware

Keeping your JBL headphones’ firmware up to date is crucial for optimal performance. Regular updates improve sound quality‚ fix bugs‚ and add new features. To update‚ connect your headphones to the JBL app on your mobile device. Ensure your device has a stable internet connection. Open the app‚ select your headphone model‚ and follow the on-screen instructions to download and install the latest firmware. Allow the process to complete without interrupting the connection. Updating firmware ensures compatibility with the latest devices and enhances your listening experience. Always check for updates periodically.

5.4 Replacing Parts

Replacing parts on your JBL headphones ensures longevity and maintains sound quality. Always use genuine JBL replacement parts to avoid compatibility issues. Purchase parts from authorized dealers or the official JBL website. Refer to the manual for specific instructions tailored to your model. For complex replacements‚ such as drivers or internal components‚ use proper tools and follow safety precautions. If unsure‚ consult a professional technician to avoid further damage. Regularly inspect and replace worn-out parts like ear cushions or cables to preserve comfort and performance.

Troubleshooting Common Issues

This section addresses frequent problems like no sound‚ distorted audio‚ or connectivity issues. Learn how to resolve these challenges quickly and effectively with practical solutions.

6.1 No Sound or Distorted Sound

If your JBL headphones produce no sound or distorted audio‚ ensure they are properly connected and charged. Check for debris in the audio jack or ports. Resetting the headphones or updating firmware can often resolve the issue. If using Bluetooth‚ ensure stable pairing and restart both devices. For severe distortion‚ refer to the manual for troubleshooting steps or contact JBL support for assistance. Proper maintenance and regular updates help maintain sound quality.

6.2 Connectivity Problems

If experiencing connectivity issues with your JBL headphones‚ ensure Bluetooth is enabled on both devices. Restart your headphones and the connected device to refresh the connection. Check for firmware updates‚ as outdated software can cause pairing difficulties. Verify that no other devices are interfering with the connection. If issues persist‚ reset your headphones by following the manual’s instructions. Ensure devices are within the recommended range and free from physical obstructions. Consult the manual for additional troubleshooting steps or contact JBL support for further assistance.

6.3 Battery Drain Issues

If your JBL headphones are experiencing rapid battery drain‚ check your usage patterns. High volume levels and frequent connectivity switches can reduce battery life. Ensure Bluetooth devices are within range to avoid excessive power consumption. Disable noise cancellation when not needed‚ as it uses additional power. Regularly update your headphones’ firmware‚ as outdated software may cause inefficiencies. Avoid extreme temperatures and store the headphones properly when not in use. Charge the battery consistently to maintain its health and performance over time.

6;4 Resetting the Headphones

To reset your JBL headphones‚ press and hold the volume up and volume down buttons simultaneously for 15 seconds. The LED indicator will flash‚ signaling the reset. This process restores the headphones to their factory settings‚ resolving connectivity or software issues. After resetting‚ pair the headphones again with your device. Note that all custom settings and paired devices will be cleared. This step is ideal for troubleshooting persistent issues or preparing the headphones for a new user.

Warranty and Support

JBL offers comprehensive warranty coverage and dedicated support to ensure optimal performance. Refer to the manual for warranty details and contact options for assistance.

7.1 Understanding the Warranty

JBL headphones come with a limited warranty covering manufacturing defects for a specified period‚ typically one or two years. This warranty includes repairs or replacements for faulty parts and labor. To claim warranty benefits‚ you must provide proof of purchase and ensure the product was purchased from an authorized dealer. Registration may also be required. Note that damage caused by misuse‚ accidents‚ or unauthorized modifications is not covered. Visit the official JBL website for detailed warranty terms and conditions. Ensure to register your product early to avoid issues.

7.2 Contacting JBL Support

For assistance with your JBL headphones‚ contact JBL Support through their official website or customer service hotline. Email support is also available for detailed inquiries. Live chat options may be accessible depending on your region. Ensure you have your product’s serial number and purchase details ready for faster assistance. Additionally‚ the JBL app can provide firmware updates and troubleshooting guides. Visit the JBL support page for direct links and resources. Check the website for regional contact options and operating hours.

7.3 Repair and Replacement Options

If your JBL headphones require repair or replacement‚ visit the official JBL website to check warranty eligibility. Many issues can be resolved through troubleshooting guides or firmware updates. For out-of-warranty repairs‚ contact JBL Support via email or live chat for service options. Be prepared to provide proof of purchase and a detailed description of the issue. Authorized repair centers may also be available in your region. Repairs not covered under warranty may incur costs.

Model-Specific Instructions

This section provides tailored guidance for popular JBL headphone models‚ ensuring optimal performance and personalized use. Explore specific setup and feature details for your JBL headphones.

8.1 JBL LIVE Series Setup

Setting up your JBL LIVE Series headphones is straightforward. First‚ ensure your headphones are fully charged. Pair them with your device via Bluetooth by holding the power button until the LED flashes blue. Once paired‚ customize settings like noise cancellation and EQ using the JBL app. For optimal sound‚ update firmware regularly. Store your headphones in a protective case when not in use to maintain their condition. Follow these steps to maximize your listening experience with the JBL LIVE Series.

8.2 JBL Reflect Aero Configuration

The JBL Reflect Aero earbuds offer a seamless configuration process. Start by enabling Bluetooth on your device and selecting “JBL Reflect Aero” from the available options. Once paired‚ customize settings like touch controls and noise cancellation through the JBL app. With an IP68 rating‚ these earbuds are built for durability. Enjoy a bass-forward yet customizable audio experience tailored to your workouts. Follow these steps to optimize your listening experience with the JBL Reflect Aero.

8.3 JBL Tune 720BT Customization

The JBL Tune 720BT headphones offer extensive customization options. Use the JBL app to adjust EQ settings‚ enhancing bass or treble for a personalized sound experience. Customize the headphone controls to suit your preferences‚ such as assigning functions to the multi-function button. Additionally‚ take advantage of the foldable design for easy storage. With up to 50 hours of playtime‚ these headphones provide long-lasting enjoyment. Explore the app to unlock more features and tailor your audio experience to your lifestyle.

8.4 JBL Quantum TWS Gaming Earbuds

The JBL Quantum TWS Gaming Earbuds are designed for immersive gaming experiences. With an IP68 rating‚ they offer superior water and dust resistance. The earbuds feature touch controls‚ allowing you to manage music‚ calls‚ and voice assistants effortlessly. Enjoy up to 24 hours of playtime with the charging case. The Quantum TWS supports wireless gaming with low latency‚ ensuring synchronized audio and video. Customize your sound experience with the JBL app and explore advanced features like adaptive noise cancellation. Perfect for gamers‚ these earbuds deliver high-quality audio and durability.

9.1 Maximizing Your JBL Headphones Experience

To maximize your JBL headphones experience‚ ensure proper setup and explore advanced features like noise cancellation and multi-device connectivity. Regularly update firmware for optimal performance and use the JBL app to customize sound settings. Clean your headphones gently to maintain quality and store them properly to prevent damage. By following these tips‚ you can enjoy immersive audio and extend the lifespan of your JBL headphones‚ enhancing your listening experience for years to come.

9.2 Final Tips for Longevity

For lasting performance‚ clean your JBL headphones regularly with soft cloths and avoid harsh chemicals. Store them in a protective case to prevent physical damage. Keep them away from extreme temperatures and moisture. Avoid overcharging the battery and use the original charger when possible. Update firmware periodically to ensure optimal functionality. By following these care tips‚ you can maintain your JBL headphones’ sound quality and extend their lifespan‚ ensuring years of reliable service and immersive audio experiences.

honeywell visionpro 8000 installation manual

Welcome to the Honeywell VisionPRO 8000 Installation Manual, your comprehensive guide for installing, configuring, and troubleshooting this advanced touchscreen programmable thermostat. Designed for HVAC systems, this manual covers models like TH8110U, TH8320U, and TH8321U, ensuring proper setup and optimal performance. Follow the step-by-step instructions to achieve precise temperature control and energy efficiency.

1.1 Overview of the VisionPRO 8000 Thermostat

The Honeywell VisionPRO 8000 is a touchscreen programmable thermostat designed for precise temperature control in residential and commercial settings. It features a user-friendly interface with a backlit display, allowing easy scheduling and adjustments. Compatible with various HVAC systems, it supports up to 3 heat/2 cool stages and includes humidity control in select models. The thermostat offers energy-saving features, remote access via Wi-Fi, and smart home integration, making it a versatile solution for modern heating and cooling needs.

1.2 Importance of Proper Installation

Proper installation of the Honeywell VisionPRO 8000 thermostat is crucial to ensure safe operation, optimal performance, and energy efficiency. Incorrect wiring or setup can lead to electrical hazards, system damage, or inefficient heating and cooling. Always follow the manual instructions carefully, as improper installation may void the warranty or cause unsafe conditions. A trained technician should handle the installation to guarantee compatibility with your HVAC system and ensure all features function correctly. Adherence to safety guidelines is essential for a reliable and long-lasting thermostat operation.

1.3 Safety Precautions and Warnings

Always follow safety guidelines to avoid electrical shock or equipment damage. Disconnect power before starting installation and ensure proper handling of wiring and components. Failure to adhere to instructions may result in hazardous conditions or system malfunctions. Only trained technicians should perform the installation to guarantee safety and compliance with manufacturer standards. Ignoring these precautions can lead to serious risks or void the product warranty. Prioritize safety to ensure reliable and efficient thermostat operation.

Pre-Installation Requirements

Verify system compatibility, gather necessary tools, and inspect packaging contents before proceeding with installation. Ensure all accessories are included and undamaged for a smooth setup process.

2.1 Understanding System Compatibility

Ensure the Honeywell VisionPRO 8000 is compatible with your HVAC system. This thermostat supports systems with up to 3 heat stages and 2 cool stages, including dehumidification. It works with both conventional and heat pump systems, and models like TH8320U and TH8321U offer advanced features. Verify compatibility with your system type to ensure proper functionality and avoid installation issues. Cross-check the system requirements before proceeding to guarantee seamless integration.

2.2 Gathering Necessary Tools and Materials

To begin the installation, gather essential tools and materials. You will need a screwdriver, wire strippers, and a voltage tester for safe electrical work. Ensure you have the correct mounting screws, wall anchors, and wiring labels. Additionally, check for any system-specific requirements, such as a common wire (C-wire) for Wi-Fi models. Always disconnect power before starting to avoid electrical hazards. Refer to the packaging for included accessories and verify all components are present for a smooth installation process.

2.3 Checking the Packaging and Accessories

Before starting the installation, carefully inspect the packaging to ensure all components are included. Verify the thermostat model number (e.g., TH8110U, TH8320U, or TH8321U) matches your system requirements. Check for the wall plate, mounting screws, wiring labels, and any additional accessories like the user manual or Wi-Fi adapter; Refer to the packaging list in the installation guide (69-2389-03) to confirm no items are missing or damaged. If any component is absent or damaged, contact Honeywell support immediately to avoid installation delays.

Installation Guide

This section provides a comprehensive guide for installing the Honeywell VisionPRO 8000 thermostat, covering step-by-step mounting, wiring diagrams, and system tests to ensure proper setup and functionality.

3.1 Step-by-Step Mounting Instructions

Begin by turning off power to the HVAC system. Remove the old thermostat and take note of the wiring configuration. Prepare the wall by cleaning and ensuring it is level. Mount the wallplate using the provided screws, ensuring it is secure and evenly aligned. Attach the thermostat to the wallplate, connecting the wires according to the wiring diagram. Tighten all connections firmly and restore power to test functionality. Ensure all components are properly seated and the display is responsive.

3.2 Wiring Diagrams and Connections

Refer to the wiring diagrams in the manual for specific connections. Identify terminals (R, W, Y, G, C, etc.) and match them to your system. For heat-only systems, connect R and W. For cooling, connect R and Y. Heat pumps require R, Y, and O/B. Ensure all wires are securely connected to the correct terminals. Double-check connections to avoid short circuits. Use the provided wiring labels for clarity. Follow the diagram for multi-stage or dual-fuel systems. Verify connections before powering on the thermostat.

3.3 Powering On the Thermostat for the First Time

After completing the wiring connections, ensure the system power is turned off at the circuit breaker. Verify all wires are securely connected to the correct terminals. Turn the power back on and wait for the thermostat to initialize. The display will light up, and you may hear a brief clicking sound. Use the touchscreen to navigate through the initial setup options, such as selecting the system type and configuring basic settings. Once initialized, perform a system test to ensure proper functionality.

System Configuration and Settings

Configure system settings to optimize performance, including temperature modes and schedules. Adjust heating and cooling options for tailored comfort and energy efficiency.

4.1 Setting Up the Initial System Mode

The Honeywell VisionPRO 8000 allows you to set the initial system mode to Heat, Cool, or Off. Navigate to the menu and select “System Mode” using the arrow buttons. Choose the desired mode based on your HVAC system type. For automatic changeover, ensure the system is set to “Auto,” or select “Manual” to control heating and cooling separately. This step ensures your thermostat operates correctly with your specific system configuration.

4.2 Configuring Heating and Cooling Options

The Honeywell VisionPRO 8000 allows you to configure heating and cooling options to optimize system performance. Navigate to the menu, select “Heating and Cooling Options,” and set temperature ranges, differential settings, and stage options. Adjust the number of heating and cooling stages based on your system’s capacity. These settings ensure efficient operation tailored to your HVAC system’s specifications, enhancing comfort and energy savings.

4.3 Enabling Wi-Fi and Remote Access

To enable Wi-Fi and remote access on your Honeywell VisionPRO 8000, navigate to the menu, select “Wi-Fi Setup,” and choose your network. Enter your network password to connect. Once connected, download and install the Honeywell Home app on your smartphone. Create an account, then link your thermostat to the app by following in-app instructions, which may include scanning a QR code or entering a code. This setup allows remote temperature adjustments, scheduling, and notifications for enhanced convenience and control.

Installer Setup Options

The Installer Setup Options allow technicians to navigate the Installer Menu, adjust settings for system optimization, enable password protection, and ensure proper functionality and system integrity.

5.1 Navigating the Installer Menu

To access the Installer Menu, press the “Menu” button and use the arrow keys to navigate through the options. This menu allows you to set system parameters, configure equipment-specific settings, and access diagnostic tools. Key options include system mode selection, fan operation, and temperature limits. Use the arrow keys to scroll and adjust settings as needed. Press “Done” to exit and save changes. Ensure all settings align with your HVAC system requirements for optimal performance.
Consult the manual or manufacturer support for complex configurations.

5.2 Adjusting Installer Settings for System Optimization

Adjusting installer settings ensures your HVAC system operates efficiently. Access the Installer Menu to modify parameters like temperature limits, fan operation, and system mode. Set optimal airflow rates and enable features like dehumidification if equipped. Configure heat pumps, dual-fuel systems, and geothermal options as needed. Ensure settings match your equipment specifications. Refer to the manual for detailed guidance on advanced configurations. Proper optimization enhances performance, energy savings, and system longevity.
Consult the manual for specific setting recommendations.

5.3 Understanding Installer Password Protection

The Honeywell VisionPRO 8000 features password-protected installer settings to prevent unauthorized changes. The password, typically the product’s date code, ensures only certified technicians can access advanced configurations. This security measure safeguards system integrity and maintains optimal performance. Enter the password in the Installer Menu to modify settings or perform diagnostics. Refer to the manual for locating the date code and detailed instructions on password application during setup or troubleshooting.
Always verify the password before making changes.

Performing the Installer System Test

Access the Installer System Test via the Installer Setup menu. Use arrow keys to navigate tests and verify system status. Press DONE to exit testing.

6.1 Running the System Test Procedure

To begin the system test, navigate to the Installer Setup menu and select “Test.” Use the arrow keys to choose from available tests, including heating, cooling, fan, and emergency heat. Press “Select” to initiate each test. The thermostat will display the system’s status, allowing you to verify proper operation. After completing all tests, press “Done” to exit and review the results. This ensures all components function correctly before finalizing the installation.

6.2 Interpreting Test Results and Troubleshooting

After running the system test, review the results displayed on the thermostat. Each component’s status will be shown, indicating if it passed, failed, or requires attention. Error messages will specify issues, such as faulty wiring or sensor malfunctions. Refer to the troubleshooting guide in the manual for solutions. If a heating or cooling test fails, check connections and ensure proper configuration. If problems persist, consult a licensed HVAC technician or Honeywell support for assistance.

6.3 Finalizing the Installation

Once all tests are successful, ensure all wiring connections are secure and properly labeled. Verify that the thermostat is mounted level and firmly attached to the wall. Double-check the system mode, heating/cooling options, and Wi-Fi connectivity. Clean up any debris or excess material from the installation site. Review the system operation with the homeowner or end-user, ensuring they understand basic functionality. Dispose of packaging responsibly and retain the manual for future reference. Finalize by registering the thermostat for warranty and support purposes.

Scheduling and Energy-Saving Features

This section covers creating custom schedules, using preset energy-saving programs, and adjusting settings to optimize efficiency and reduce energy consumption.

7.1 Creating Custom Schedules

The Honeywell VisionPRO 8000 allows you to create custom schedules tailored to your daily routine. Use the touchscreen interface to set specific temperatures for different times of the day, ensuring comfort and energy efficiency. Access the menu, select “Schedule” options, and program unique settings for each day of the week. This feature enables you to customize heating and cooling preferences, optimizing your system’s performance and reducing energy consumption.

7.2 Using Energy-Saving Preset Programs

The Honeywell VisionPRO 8000 offers energy-saving preset programs designed to optimize your HVAC system’s efficiency. These pre-configured schedules adjust temperatures during peak and off-peak times, helping you save energy without compromising comfort. Select from options like “Home,” “Away,” “Sleep,” and “Vacation” modes to automate temperature settings. These programs ensure your system runs efficiently, reducing energy consumption and lowering utility bills while maintaining a comfortable environment year-round.

7.3 Adjusting Schedules for Optimal Efficiency

Adjusting schedules on the Honeywell VisionPRO 8000 ensures your HVAC system operates efficiently while maintaining comfort. Use the touchscreen interface to fine-tune temperature settings for different times of the day or week. Adjusting schedules based on your lifestyle can help reduce energy consumption. For example, lower the temperature when sleeping or away from home. These adjustments can be made manually or through the mobile app, allowing you to optimize energy use without sacrificing comfort. Regular updates ensure peak performance and energy savings.

Advanced Features and Customization

The Honeywell VisionPRO 8000 offers smart home integration, remote alerts, and customizable display settings for enhanced control and personalized comfort. Use these features to tailor your experience.

8.1 Enabling Smart Home Integration

To enable smart home integration with the Honeywell VisionPRO 8000, navigate to the Installer Menu and select Smart Home Options. Choose your preferred smart home platform, such as Amazon Alexa or Google Home, and follow the on-screen prompts to link your accounts. Ensure your thermostat is connected to Wi-Fi and that the Honeywell Home app is installed on your device; This integration allows voice control and seamless system management through your smart home ecosystem, enhancing convenience and flexibility for optimal comfort.

8.2 Setting Up Remote Alerts and Notifications

To set up remote alerts and notifications for the Honeywell VisionPRO 8000, access the Installer Menu and select Notifications. Choose the types of alerts you want to receive, such as system maintenance reminders, temperature extremes, or equipment performance issues. Ensure your thermostat is connected to Wi-Fi and linked to the Honeywell Home app. Enable push notifications in the app settings to receive real-time updates. This feature ensures you stay informed about your HVAC system’s status and can address issues promptly, even when you’re not home.

8.3 Customizing the Display Settings

Customize the Honeywell VisionPRO 8000 display to suit your preferences. Adjust the screen brightness for optimal visibility. Select from multiple language options to ensure ease of use. Set the date and time formats, and enable the screen saver with a clock display or blank screen option. Additionally, you can customize the display theme and color scheme for a personalized look. These settings enhance user experience and are accessible through the Installer Menu, allowing you to tailor the thermostat’s interface to your specific needs and preferences.

Maintenance and Troubleshooting

Regularly clean the touchscreen and check for software updates to ensure optimal performance. Troubleshoot common issues like connectivity problems or error codes using the manual’s detailed guide.

9.1 Regular Maintenance Tips

Regular maintenance ensures the Honeywell VisionPRO 8000 operates efficiently. Clean the touchscreen with a soft cloth to prevent dust buildup. Check for firmware updates to keep the system current. Ensure proper installation and wiring to avoid malfunctions. Test the thermostat’s functionality periodically. Replace batteries (if applicable) as needed to maintain operation. Refer to the manual for detailed maintenance schedules and procedures to keep your thermostat running smoothly and reliably year-round.

9.2 Common Issues and Solutions

Common issues with the Honeywell VisionPRO 8000 include connectivity problems, inaccurate temperature readings, and unresponsive screens. For Wi-Fi issues, restart the router and ensure the thermostat is connected to the correct network. If the temperature is off, calibrate the thermostat or check sensor placement. For an unresponsive screen, restart the device or check for loose wiring. Refer to the troubleshooting section in the manual for detailed solutions and ensure firmware is up-to-date to resolve software-related issues effectively.

9.3 Resetting the Thermostat to Factory Settings

Resetting the Honeywell VisionPRO 8000 to factory settings restores default configurations, erasing all custom settings. To reset, navigate to the Installer Setup menu, select “Factory Reset,” and enter the installer password (usually the date code on the thermostat). Confirm the reset to revert all settings to their original state. Note that this will clear schedules, Wi-Fi configurations, and system preferences, requiring you to reconfigure the thermostat after the reset is complete.

With the Honeywell VisionPRO 8000 installed, configured, and tested, you’ve successfully integrated advanced temperature control into your home. The thermostat now operates efficiently, ensuring comfort and energy savings through its smart features and customizable settings. Refer to the manual or online resources for further assistance or updates.

10.1 Summary of Key Installation Steps

Start by disconnecting power to the HVAC system for safety. Mount the thermostat on a level surface, ensuring proper wiring connections as per the diagram. Configure basic settings like system mode and temperature preferences. Enable advanced features such as Wi-Fi and remote access. Perform an installer system test to verify functionality. Finally, review all configurations to ensure optimal performance and energy efficiency. This completes the installation process for the Honeywell VisionPRO 8000 thermostat.

10.2 Final Checks for Proper Functionality

After installation, ensure the thermostat powers on and the display is clear. Test heating, cooling, and fan modes to confirm proper operation. Verify remote access functionality if Wi-Fi is enabled. Check the accuracy of temperature readings and schedule adherence. Ensure all wired connections are secure and no error messages appear. Finally, review the system’s response to temperature changes and confirm smooth operation across all configured settings to ensure the Honeywell VisionPRO 8000 is functioning as intended;

10.3 Resources for Further Assistance

For additional support, visit Honeywell’s official website or refer to the provided user manual. Contact Honeywell customer support at 1-800-468-1502 for technical assistance. Download the complete installation manual or user guide from Honeywell’s resource library. Consult online forums or certified HVAC professionals for complex issues. Ensure to register your thermostat for warranty and updates. Access the Honeywell Home app for remote monitoring and troubleshooting. For detailed specifications, refer to the technical literature available on Honeywell’s website.